
Sign In quickstart
Create a Sign-In Context, enable a module, and take a guest through the Captive Portal.
This quickstart takes an Organization from no Sign-In Context to a working guest-sign-in flow you can demo. Expect to spend about 15 minutes.
Before you begin
Section titled “Before you begin”You have administrator access to the Organization and the Admin Dashboard is open at the Organization Services overview. This is the starting point for every Sign In workflow.
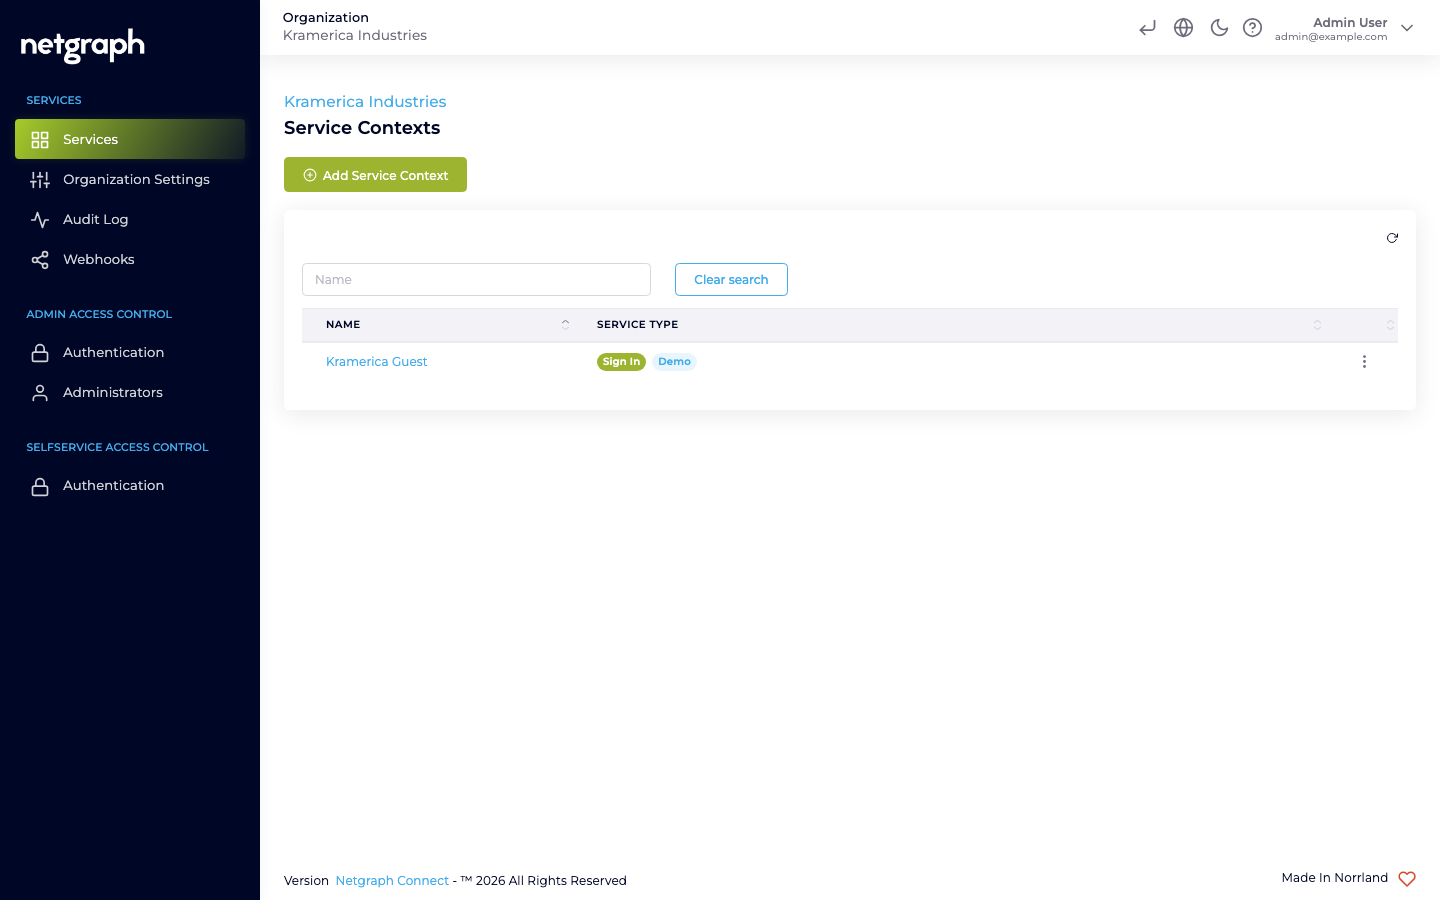
1. Create the Sign-In Context
Section titled “1. Create the Sign-In Context”The Sign-In Context is the instance of Sign In inside this Organization. You can have more than one per Organization (for example, one per venue).
-
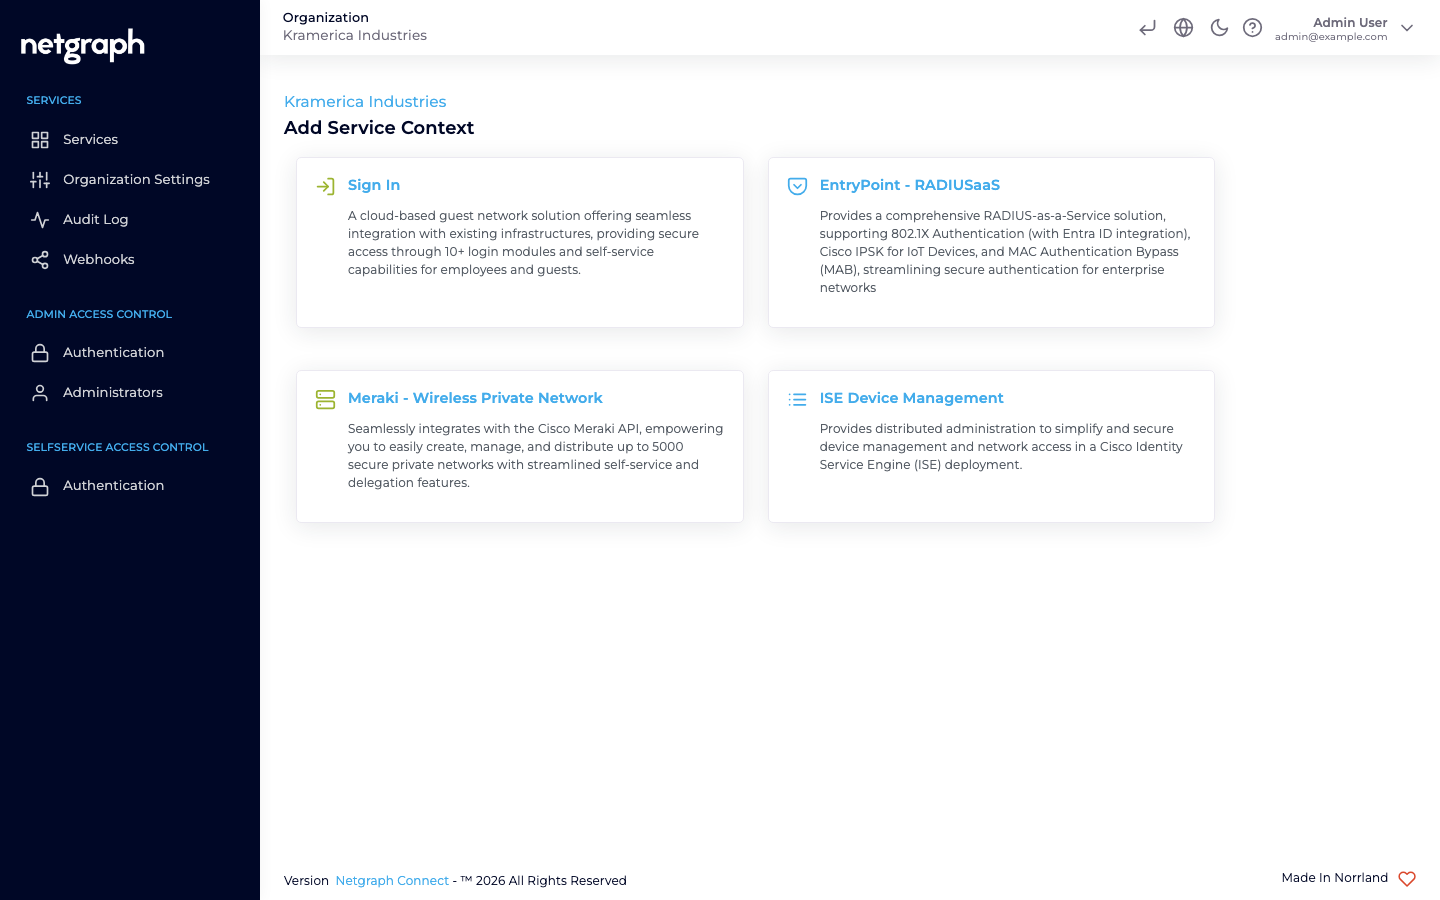
Open Add Service Context
From the Services overview, click Add Service Context, then pick Sign-In on the context-type picker.
-
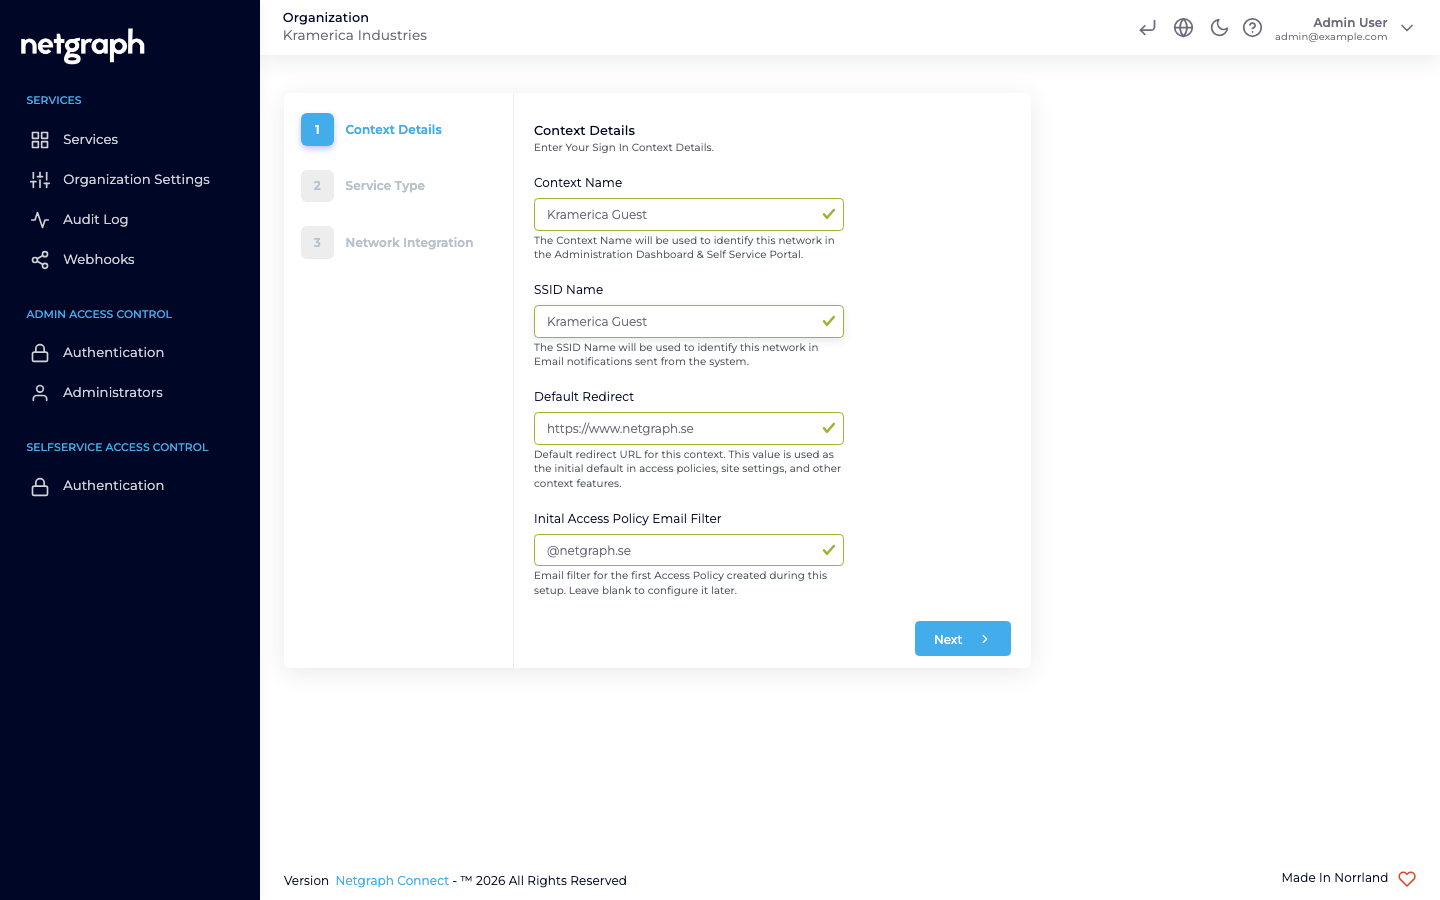
Fill in Context Details
- Context Name — identifies this network in the Administration Dashboard and Self-Service Portal. Example: Guest WiFi — HQ.
- SSID Name — identifies this network in email notifications sent from the system.
- Default Redirect — the default URL used in Access Policies, site settings, and other context features. Auto-populated from the Organization’s website; edit if needed.
- Inital Access Policy Email Filter (optional) — email pattern for the first Access Policy created by this wizard. Leave blank to configure it later.
-
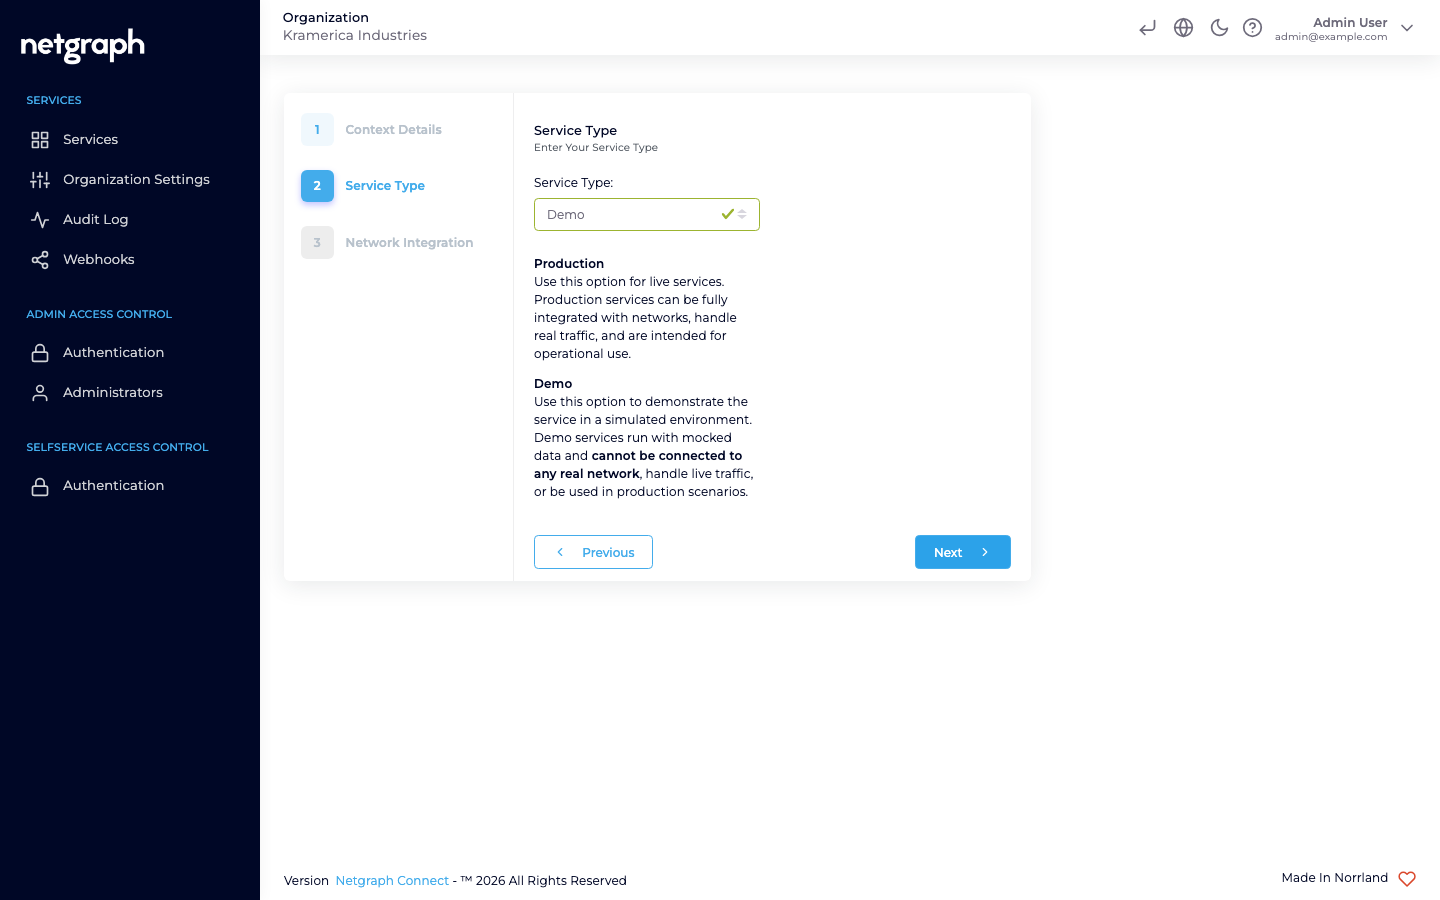
Select Service Type
- Production — for live deployments. Integrates with real networks and handles real traffic.
- Demo — a simulated environment with mocked data. Useful for evaluation and training. Cannot connect to a real network.
-
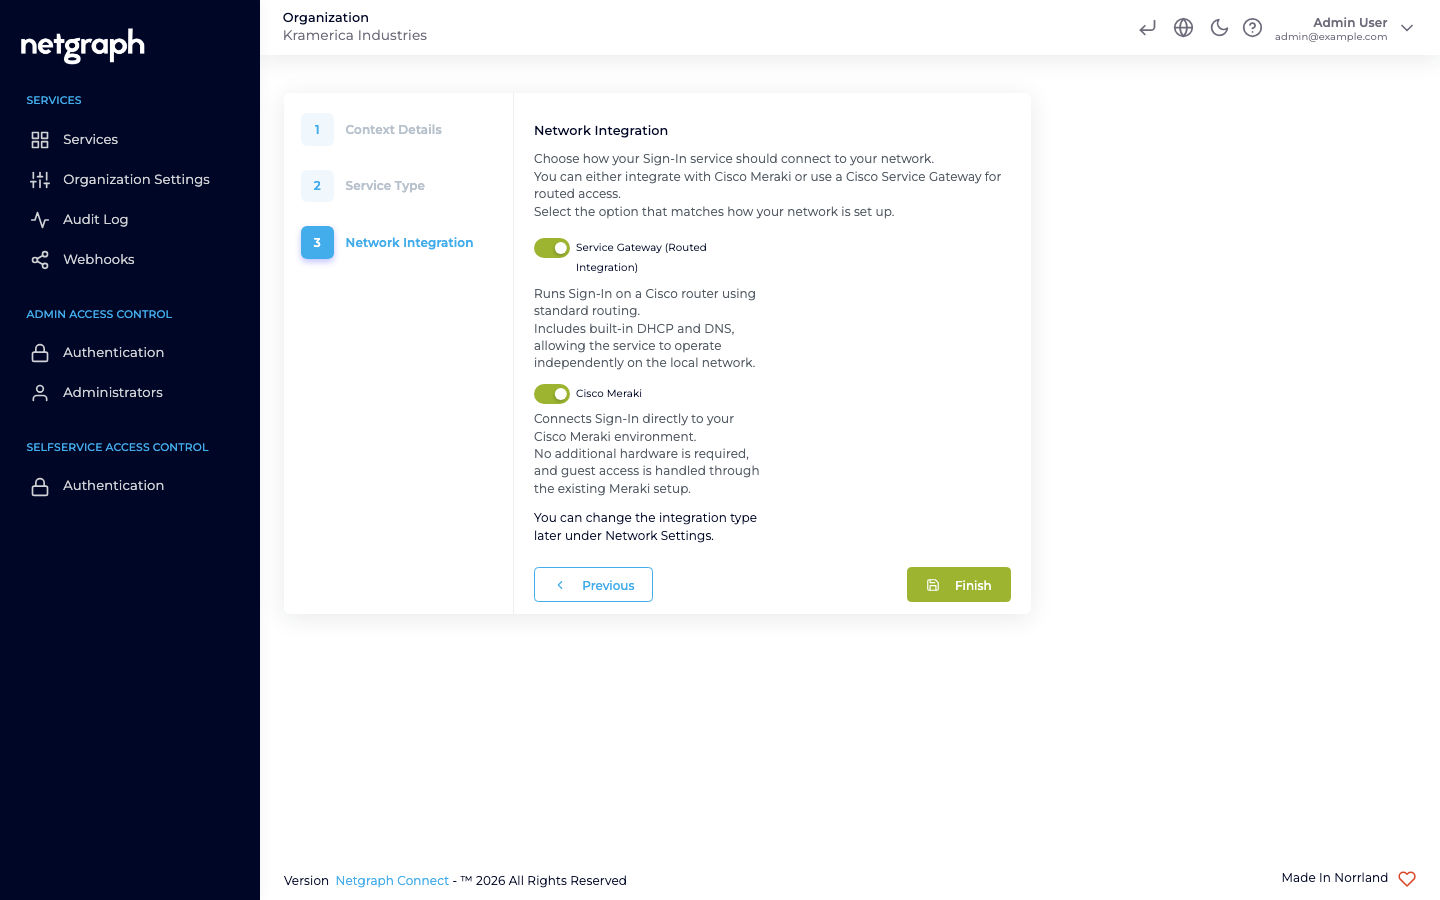
Select Network Integration
Choose one or both — you can change this later under Network Settings.
- Service Gateway (Routed Integration) — Sign-In runs on a Cisco router (Catalyst / IOS-XE / SD-WAN) with built-in DHCP and DNS.
- Cisco Meraki — direct integration with your Meraki dashboard; no additional hardware required.
-
Finish
Click Finish. You land on the first integration’s configuration page (for example, Service Gateway settings). The Context is now live and the left-hand navigation shows the Sign-In sections: Sign In, Captive Portal, Portal Configuration, Administration, and Service Integration.
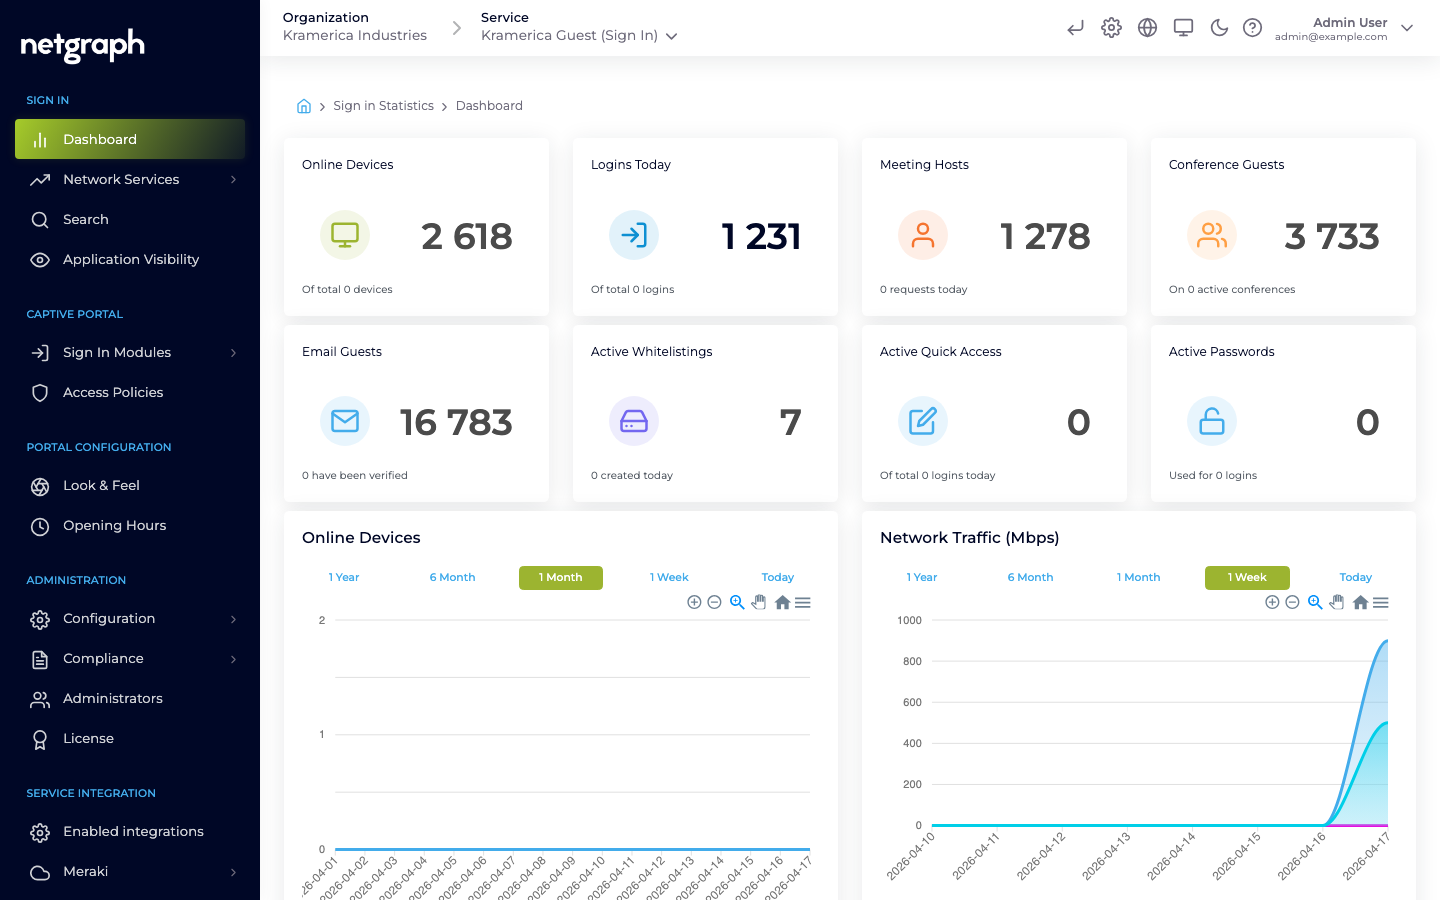
A fresh Sign-In Context dashboard.
2. Enable a Sign In Module
Section titled “2. Enable a Sign In Module”Every module is configured at Context level and then enabled per Access Policy. For a fast first test, use Email Self Provisioning:
-
Open the module
In the left nav, go to Sign In Modules → Email Self Provisioning.
-
Activate the module
The Email Self Provisioning Status card on the top-right shows the module as Not Active. Click Activate Email Self Provisioning Login Module to turn it on.
-
Set basic configuration
Accept the defaults to get started. You can tune session length and device limits later via the Access Policy.
See Sign In Modules for a comparison of the available modules.
3. Configure look and feel (optional)
Section titled “3. Configure look and feel (optional)”From Portal Configuration → Look & Feel you can upload a logo, choose colors and fonts, and add a background image. The portal is responsive by default.
For translating the portal to additional languages or overriding specific strings, see the Languages setup guide.
4. Test as a guest
Section titled “4. Test as a guest”-
Open the Captive Portal preview
The Captive Portal link sits at the top of the header of the Sign-In Context admin — it opens the real portal in a new tab.
-
Sign in through the module you enabled
In this guide you enabled Self-Provisioning by Email. Enter an email and follow the verification flow.
-
Check the dashboard
Back in the admin, Dashboard shows the login you just created and the device that was registered.