
Managing Endpoint Identity Groups
How to bring Cisco ISE's existing groups under managed administration, create new groups from the platform, rename them, and disconnect cleanly.
Endpoint Identity Groups are the unit of delegation in Endpoint Manager. This page covers the admin-side lifecycle: listing, connecting, creating, renaming, and disconnecting. For what a Group Administrator does inside a group day-to-day, see Managing endpoints and Managing Self-Service Users.
The Groups list
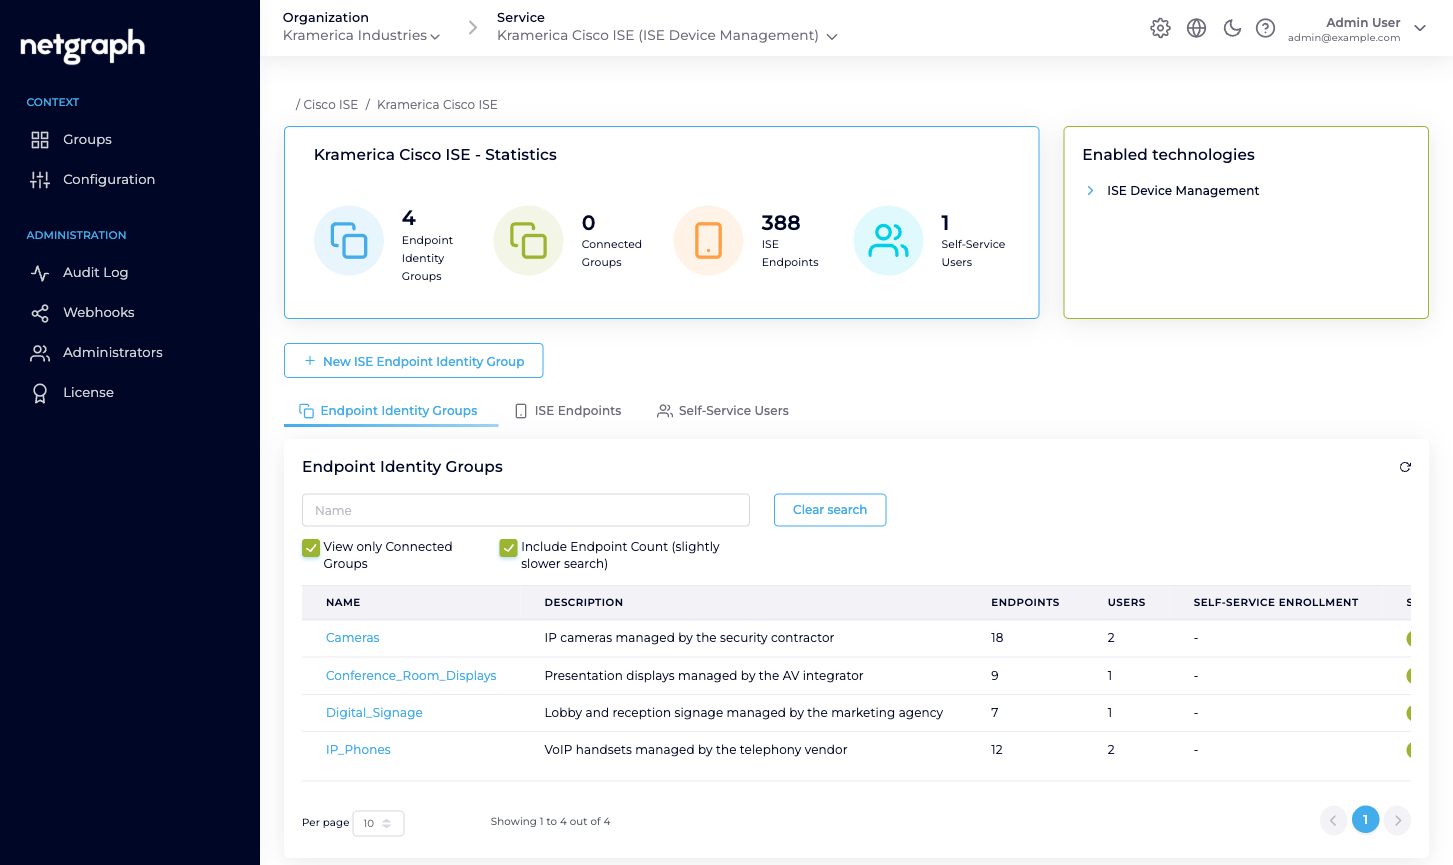
Section titled “The Groups list”Open the Context and pick Groups in the left navigation. You land on the Context overview with the Endpoint Identity Groups tab selected.
The list shows every Endpoint Identity Group in your Cisco ISE — not just the ones under managed administration. Columns:
- Name — exactly what Cisco ISE reports.
- Description — the ISE-side description.
- Endpoints — how many endpoints ISE currently has in the group.
- Users — how many Self-Service Users are on the group (n/a if Not Connected).
- Self-Service Enrollment — whether auto-enrollment via SAML is turned on for the group (n/a if Not Connected).
- Status — Connected (managed) or Not Connected.
- Action — a row menu: Disconnect Group for connected groups, Connect this Group for those that aren’t.
Above the list:
- A Name search to filter.
- View only Connected Groups to hide the unmanaged ones.
- Include Endpoint Count — on by default; counts are slightly slower to fetch, so you can turn it off if the list is very large.
Connecting an existing ISE group
Section titled “Connecting an existing ISE group”If the group already exists on the Cisco ISE side — a profile- driven group, a group someone set up manually, a group populated by an identity source — bring it under managed administration without duplicating it.
-
Find the group in the list
Use the Name search if the list is long.
-
Open its row menu
The three-dot menu on the right of the row.
-
Click Connect this Group
A confirmation dialog appears: Connect this group: <name>. Confirm.
The group’s Status flips to Connected and the Users and Self-Service Enrollment columns become writable. You can now invite Self-Service Users, apply Custom Attribute values, and delegate endpoint administration.
Creating a new group from the platform
Section titled “Creating a new group from the platform”If the group doesn’t yet exist in ISE, create it here and the platform will create it on the ISE side too — in a single step, already connected.
-
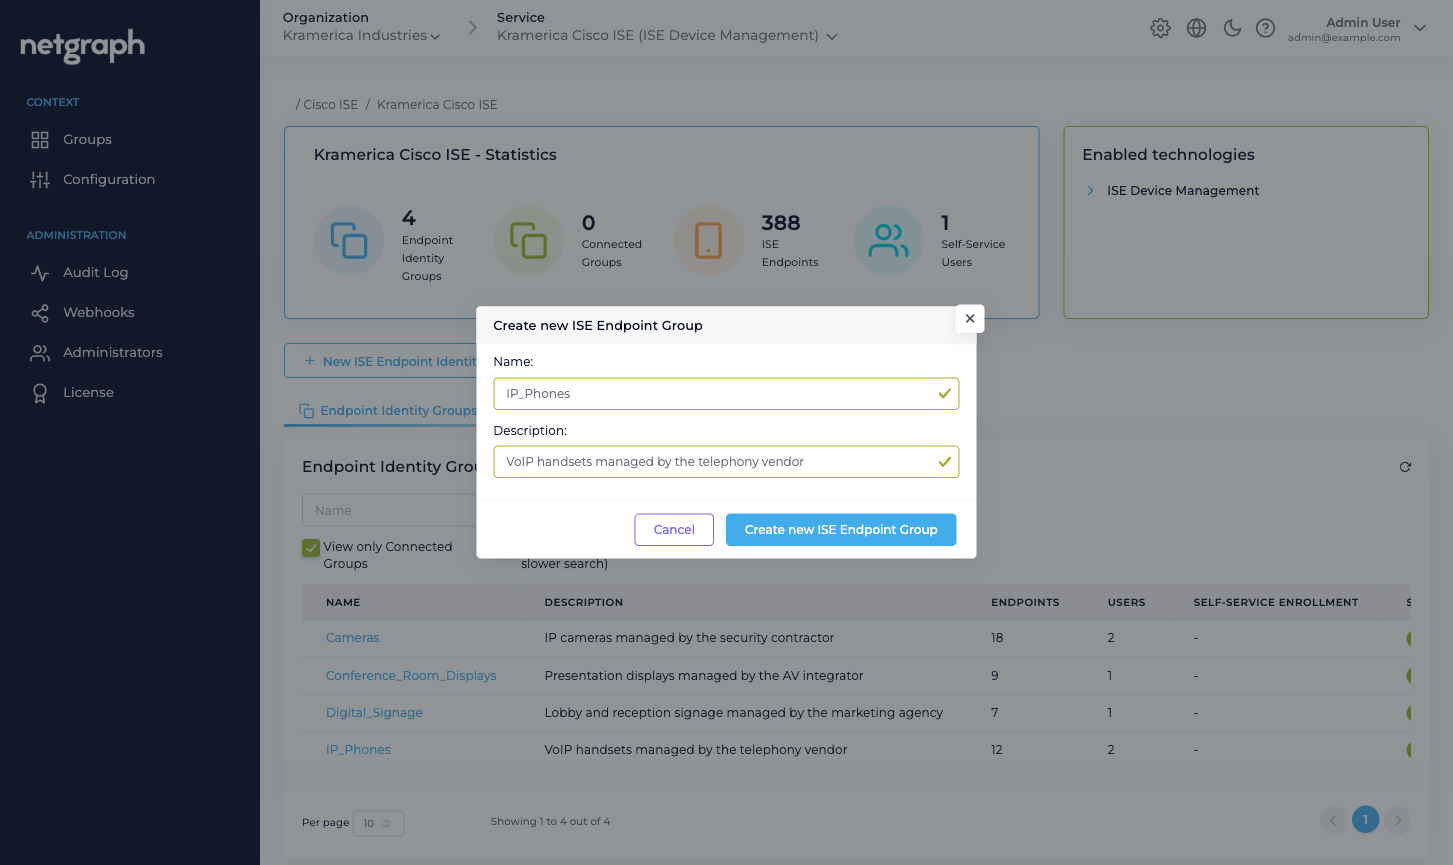
Click New ISE Endpoint Identity Group
The primary-coloured button above the list.
-
Fill in Name and Description
The Name is what Cisco ISE stores; keep it to the conventions your ISE deployment follows (no spaces, often underscores). The Description helps you and your delegated administrators remember what the group is for.
-
Click Create new ISE Endpoint Group
The platform creates the group on the ISE side via the Endpoint Groups API and routes you straight to its detail view, already Connected.
Inside a group
Section titled “Inside a group”Every connected group’s detail view is the same four-tab shape:
| Tab | What it does |
|---|---|
| ISE Endpoints | The endpoints in the group. Search, Add Device, Batch Add Endpoints. |
| Self-Service Users | The delegated administrators on this group, plus the auto-enrollment toggle. |
| Custom Attributes | Two sub-tabs: the group’s own values for group level attributes, and which endpoint level attributes its devices use. |
| Group Settings | Rename the group, set its Wi-Fi SSID, and disconnect it from managed administration. |
Three of the tabs (Self-Service Users, Custom Attributes, Group Settings) are only available on connected groups. If a group is Not Connected you can still look at its endpoints read-only, but you can’t do anything that belongs on the managed-admin layer.
Group Settings — rename and disconnect
Section titled “Group Settings — rename and disconnect”The Group Settings tab holds two cards: Group name and Group Management Status.
Rename
Section titled “Rename”Change the group’s display name on the platform side. This is only the name you see in the admin and in the Self-Service portal — it doesn’t touch the ISE-side group name. If you rename the group in Cisco ISE’s own admin, rename it here too so the two sides stay aligned.
Disconnect
Section titled “Disconnect”The only destructive action on the Group Settings tab is Disconnect this group. The platform has no “delete the ISE group” button — you cannot remove an Endpoint Identity Group from Cisco ISE through the platform.
Disconnect drops managed administration and cleans up everything the platform layered on top of the ISE group:
- Every Self-Service User on the group is removed and their invitations revoked.
- Every Managed Attribute value set at the group level is cleared from the platform.
- The group no longer appears as Connected in the Groups list, and its detail view becomes read-only.
The confirmation dialog states this verbatim:
This action will disconnect the group <name> and all associated self-service users and managed settings will be deleted. However, this will not impact any configurations in ISE, such as endpoint identity groups or devices.
You can reconnect the group from the Groups list at any time. Endpoints keep flowing through ISE as usual — policy, VLAN, authentication all stay unchanged.
If you genuinely want the group gone from Cisco ISE, delete it in ISE’s own admin (under Administration → Identity Management → Groups → Endpoint Identity Groups).