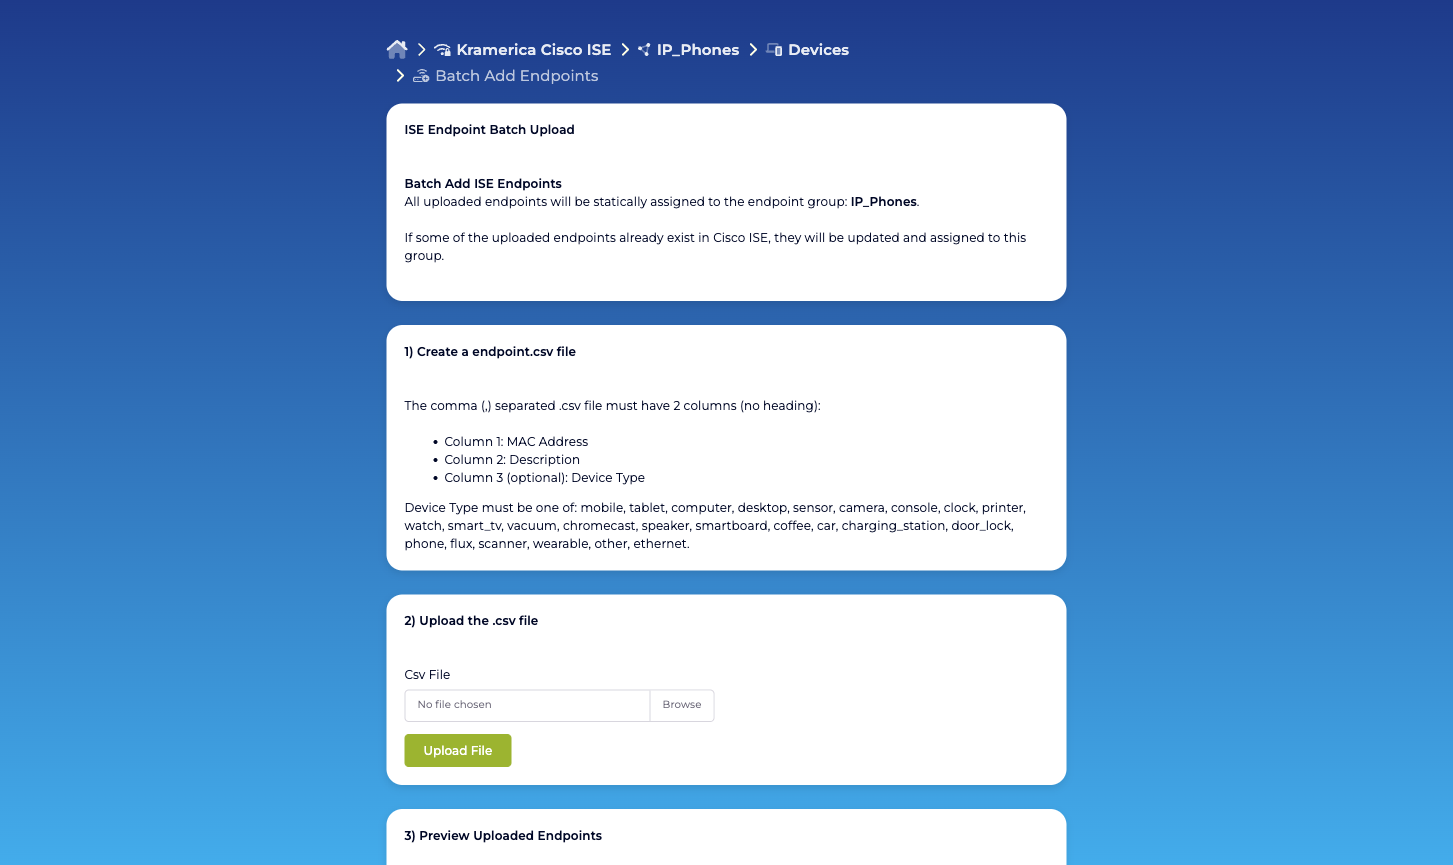
Batch adding endpoints
Upload a CSV of endpoints to a managed group — from the admin side or the Self-Service portal. Four steps, preview before commit, auto-move of MACs that already live somewhere else.
Batch import is the fastest way to bring a new fleet of endpoints into a managed Endpoint Identity Group. The wizard is identical in shape on the admin side and the Self-Service side; delegated administrators use the same four-step flow their Organization admin does.
Before you start
Section titled “Before you start”Prepare a comma-separated .csv file with no header row and
two to three columns per row:
- MAC Address — 12 hexadecimal digits (a standard 48-bit MAC). Any common format accepted (colons, dashes, or plain); separators are stripped before counting. Stored lowercase.
- Description — free text. Typically a short human label (“Reception desk phone”, “Lobby camera 1”).
- Device type — optional. Must be one of the platform’s
recognised device-type values, case-insensitive:
mobile,tablet,computer,desktop,sensor,camera,console,clock,printer,watch,smart_tv,vacuum,chromecast,speaker,smartboard,coffee,car,charging_station,door_lock,phone,flux,scanner,wearable,other,ethernet. Step 1 of the wizard also prints the live list inline.
Example:
00:11:22:aa:bb:01,Reception desk phone,phone00:11:22:aa:bb:02,Lobby camera 1,camera00:11:22:aa:bb:03,Conf room A display,smart_tv00:11:22:aa:bb:04,Door reader — north entry,door_lock00:11:22:aa:bb:05,Unlabelled wired device,The third column can be omitted per-row if you don’t want to set a device type — leave it empty or drop the trailing comma.
Running the wizard
Section titled “Running the wizard”Open a managed Endpoint Identity Group and click Batch Add Endpoints (admin side) or Batch Add Devices (Self-Service side). The wizard walks through four steps.
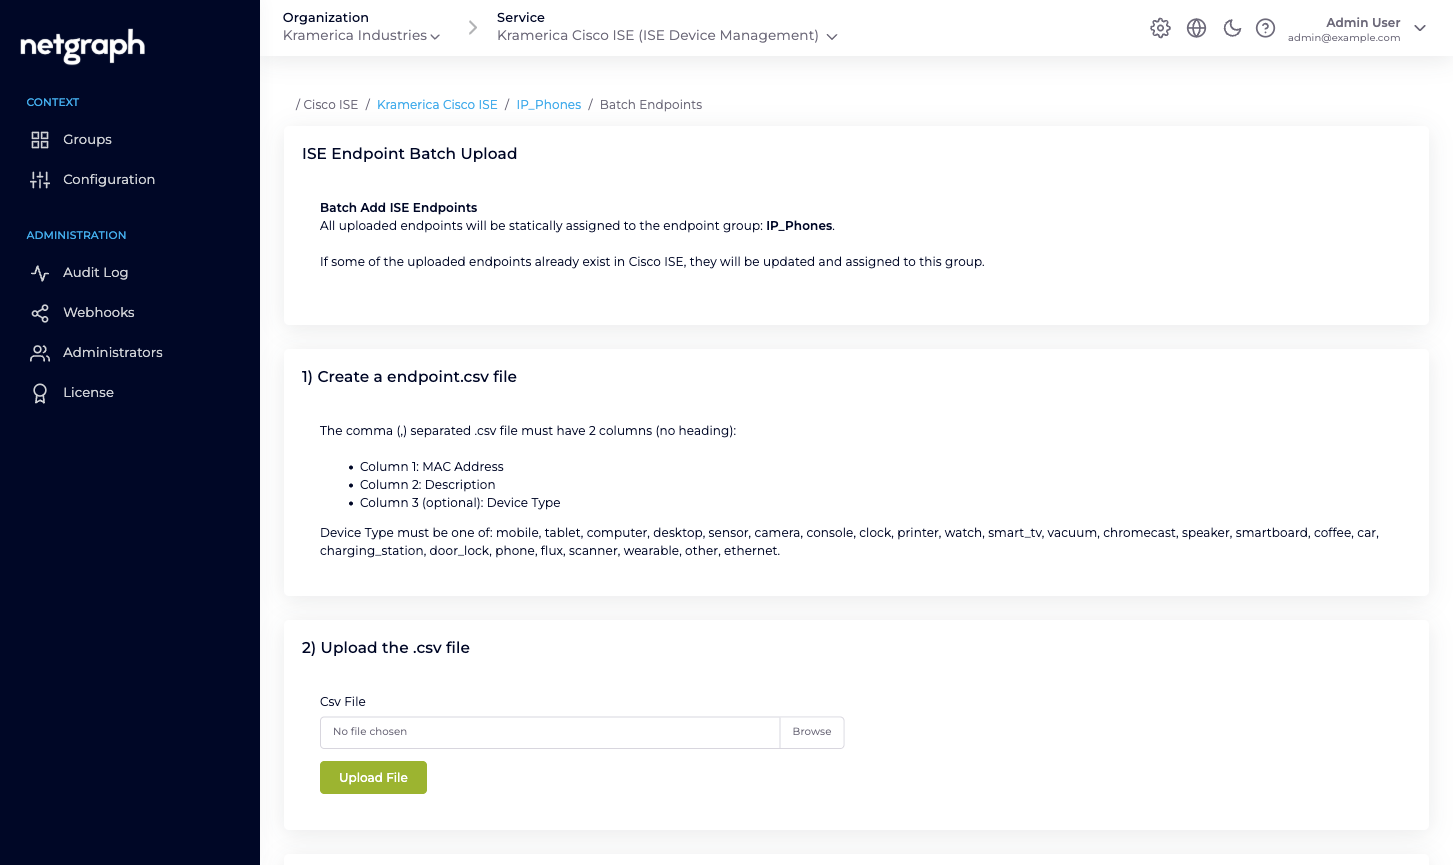
Step 1 — Create a endpoint.csv file
Section titled “Step 1 — Create a endpoint.csv file”The wizard shows the exact format it expects, and lists the allowed device-type values inline. Prepare the file outside the browser with a spreadsheet tool or a text editor.
Step 2 — Upload the .csv file
Section titled “Step 2 — Upload the .csv file”Pick the file and click Upload File. The wizard parses it on the client — no data hits the platform yet.
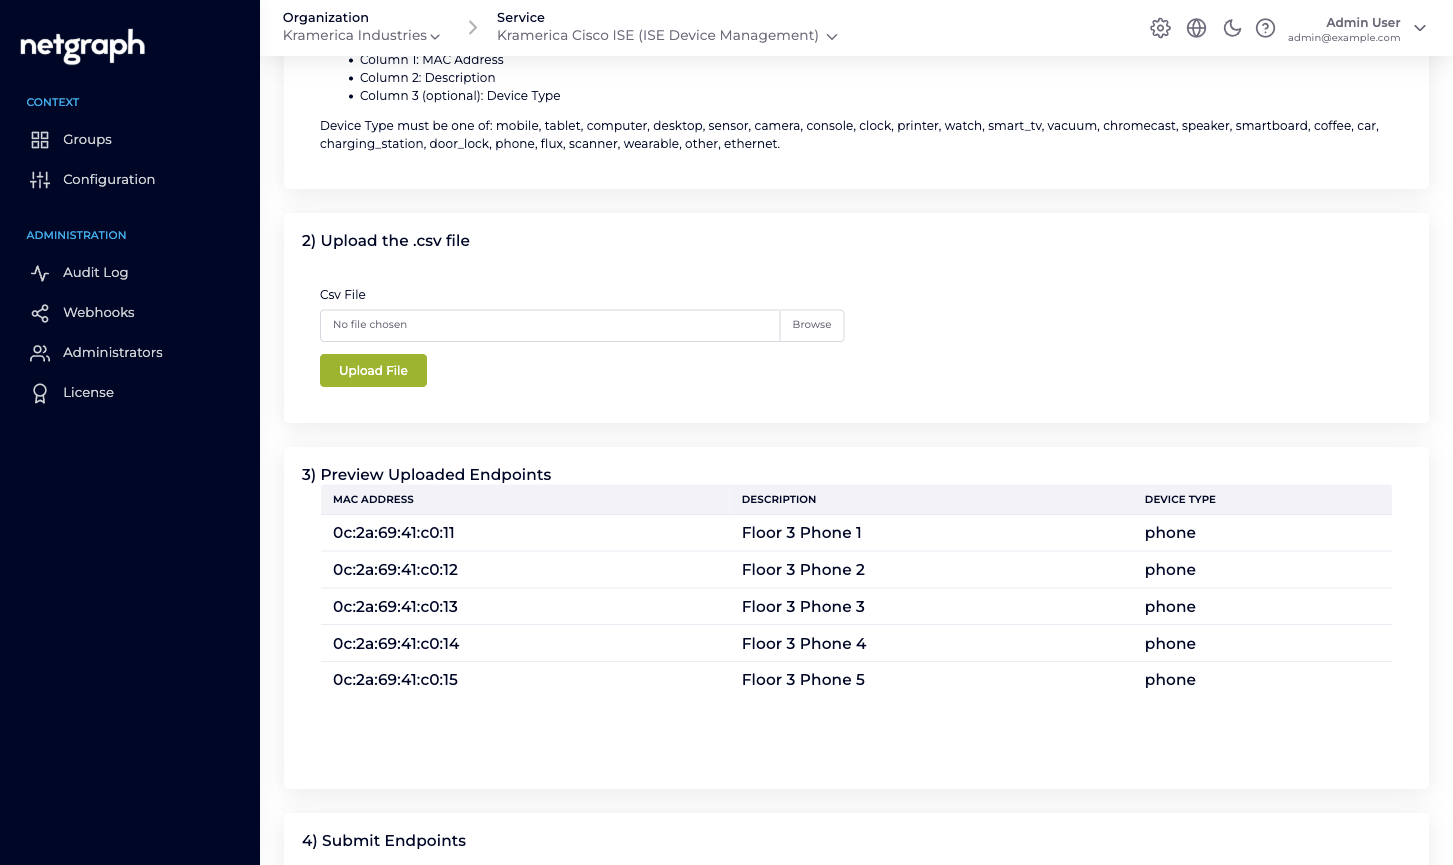
Step 3 — Preview Uploaded Endpoints
Section titled “Step 3 — Preview Uploaded Endpoints”A table of every row the parser picked up. Per-row validation flags issues inline:
- Invalid MAC Address — the row’s first column isn’t 12 valid hexadecimal digits.
- Invalid Device Type — the third column isn’t one of the platform’s recognised device-type values.
Any row with a validation error is highlighted. If the file has any errors at all, the wizard blocks you from moving to step 4 until you fix the CSV and re-upload.
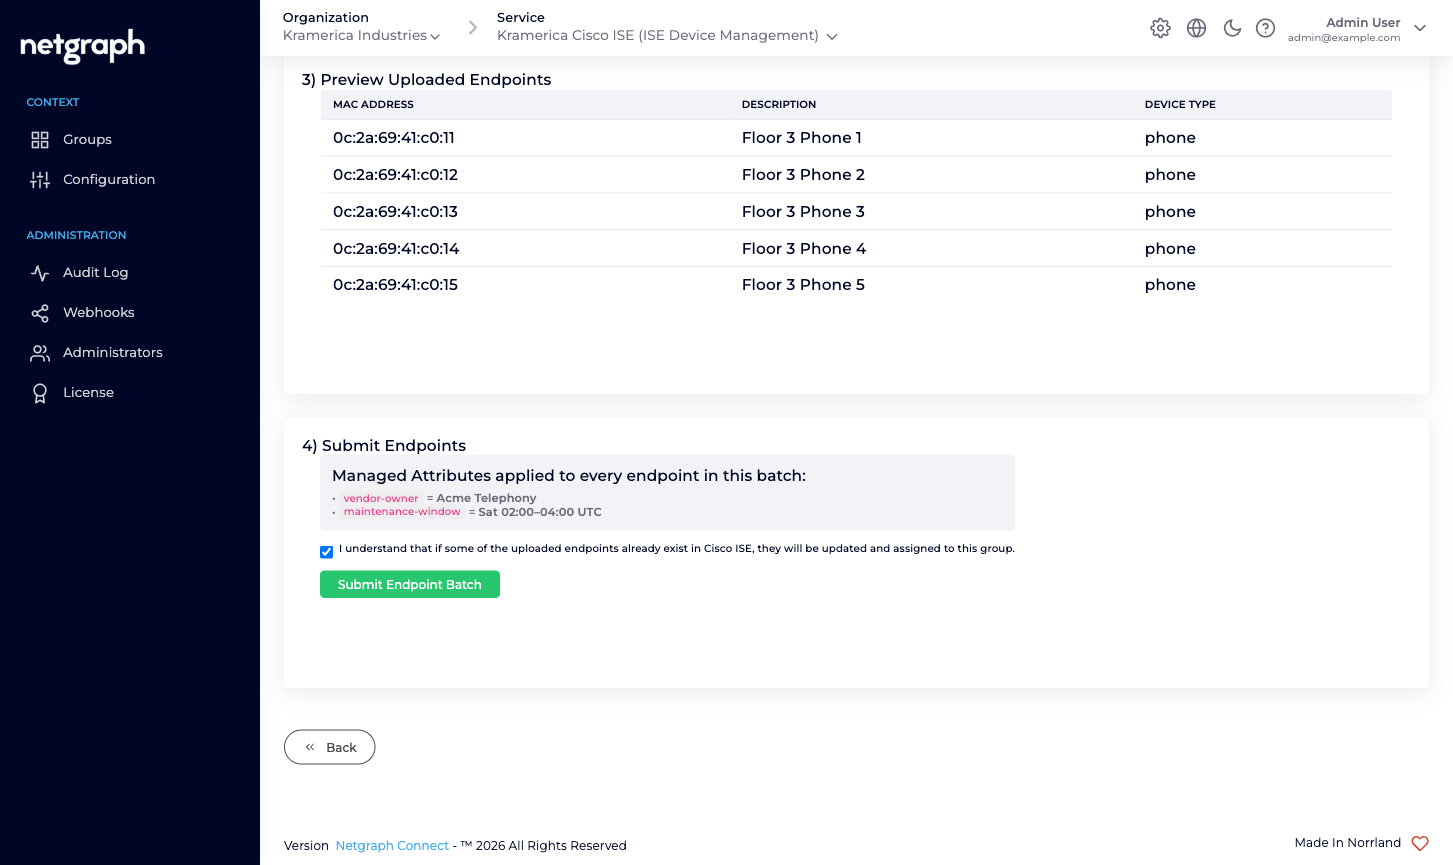
Step 4 — Submit Endpoints
Section titled “Step 4 — Submit Endpoints”With all rows valid, step 4 shows you the group level attribute values that will be applied to every endpoint in this batch, and asks you to confirm:
I understand that if some of the uploaded endpoints already exist in Cisco ISE, they will be updated and assigned to this group.
Tick the checkbox and click Submit Endpoint Batch. The platform sends the endpoints to Cisco ISE in one bulk operation:
- New MACs are created in ISE as members of this group.
- Existing MACs already in this group get their description and attributes updated.
- Existing MACs in another group are moved into this group (their description and attributes updated in the process).
On success you’ll see a toast:
ISE Bulk Requests successfully submitted
How existing-MAC handling works
Section titled “How existing-MAC handling works”The bulk-import flow is deliberately forgiving about endpoints Cisco ISE already knows. The rule is simple: after the batch finishes, every MAC in the CSV is a member of this group, and nothing else’s.
- A brand-new MAC is created.
- A MAC already in this group is updated in place.
- A MAC in a different group is moved into this group, keeping its MAC but taking on this group’s description and attribute values.
If that’s not what you want — for example, you’re uploading a list that’s a subset of an existing group — consider a spot check first, or use a disposable test group.
Limits and cadence
Section titled “Limits and cadence”- The wizard accepts files up to a few thousand rows comfortably; if your list is much larger than that, split it.
- ISE’s bulk endpoint API processes the endpoints server-side — expect a delay between “Submitted” and the list reflecting the new membership, particularly on larger deployments.
- Validation errors are caught client-side before submission; server-side rejects (for example, a malformed attribute value that only shows up at ISE write time) surface as per-row errors in the response toast.
What’s different on the Self-Service side
Section titled “What’s different on the Self-Service side”Group Administrators can run the same wizard from their group in the Self-Service portal. Differences:
- The action is labelled Batch Add Devices (not Batch Add Endpoints).
- Error messages are written for end users (“Invalid MAC Address” rather than “Validation error: hex”).
- Everything else — the four steps, the validation, the bulk commit — is identical.