
Managing Wireless Personal Networks
Create one apartment, batch-create a whole building, rename, rotate the key, watch connected devices, and delete — all from the Context admin.
Wireless Personal Networks are the units you manage day-to-day. This page covers the admin lifecycle: create, configure, rotate, remove. For the resident-side experience, see Self-Service portal.
Creating a single Wireless Personal Network
Section titled “Creating a single Wireless Personal Network”Use this when you’re adding one unit at a time — a new apartment coming online, a test unit, a one-off.
-
Open the Context
Click Create Wireless Personal Network on the Context overview. The form opens on the Create single tab.
-
Name the WPN
Typically the unit identifier — Apartment 301, Room 4, Suite B. This is the label residents see when they land in the Self-Service portal.
-
Accept or edit the Pre-Shared Key
The form auto-generates a PSK matching the Context’s PSK defaults. You can accept it, paste your own (8–63 characters), or press the regenerate control for a fresh one.
-
Click Create Wireless Personal Network
The platform writes the Meraki Identity PSK on every associated Meraki network and, depending on the Group Policy Strategy, either creates a dedicated Network Access Policy or attaches the PSK to the shared one.
Batch-creating a building
Section titled “Batch-creating a building”Onboarding every apartment in a building at once is common for student housing, co-living, and hotels-with-apartments. Switch to the Create multiple tab.
-
Enter a Name prefix
For example Apartment (with a trailing space) — the platform will append the counter. Output names read “Apartment 101”, “Apartment 102”, etc.
-
Set Start counter at
The first unit number to create.
-
Set Number of networks
How many to create in a contiguous run.
-
Click Batch Create Wireless Personal Networks
The platform generates a unique PSK per WPN using the Context’s PSK defaults, and writes them all to Meraki. Large batches take a while — the Meraki Dashboard API is rate-limited per organization — so expect a pause.
Tip
You can mix Create single and Create multiple. Batch-create the regular apartments up front, then add edge cases (the building manager’s suite, the common room) with Create single.
Create in bulk, or reconcile in bulk
Batch Create only adds new, empty WPNs. To update, reset, or remove WPNs and their residents in bulk (for example a term change where some tenants stay, some leave, and new ones arrive), use Batch Group Sync: it matches the whole Context to a CSV file after showing you a plan. The Export Groups button on the Context overview downloads the current WPNs and their Self-Service Users as that CSV, so you can edit and re-upload it.
Viewing a Wireless Personal Network
Section titled “Viewing a Wireless Personal Network”Click any WPN name on the Context overview to open its detail page.
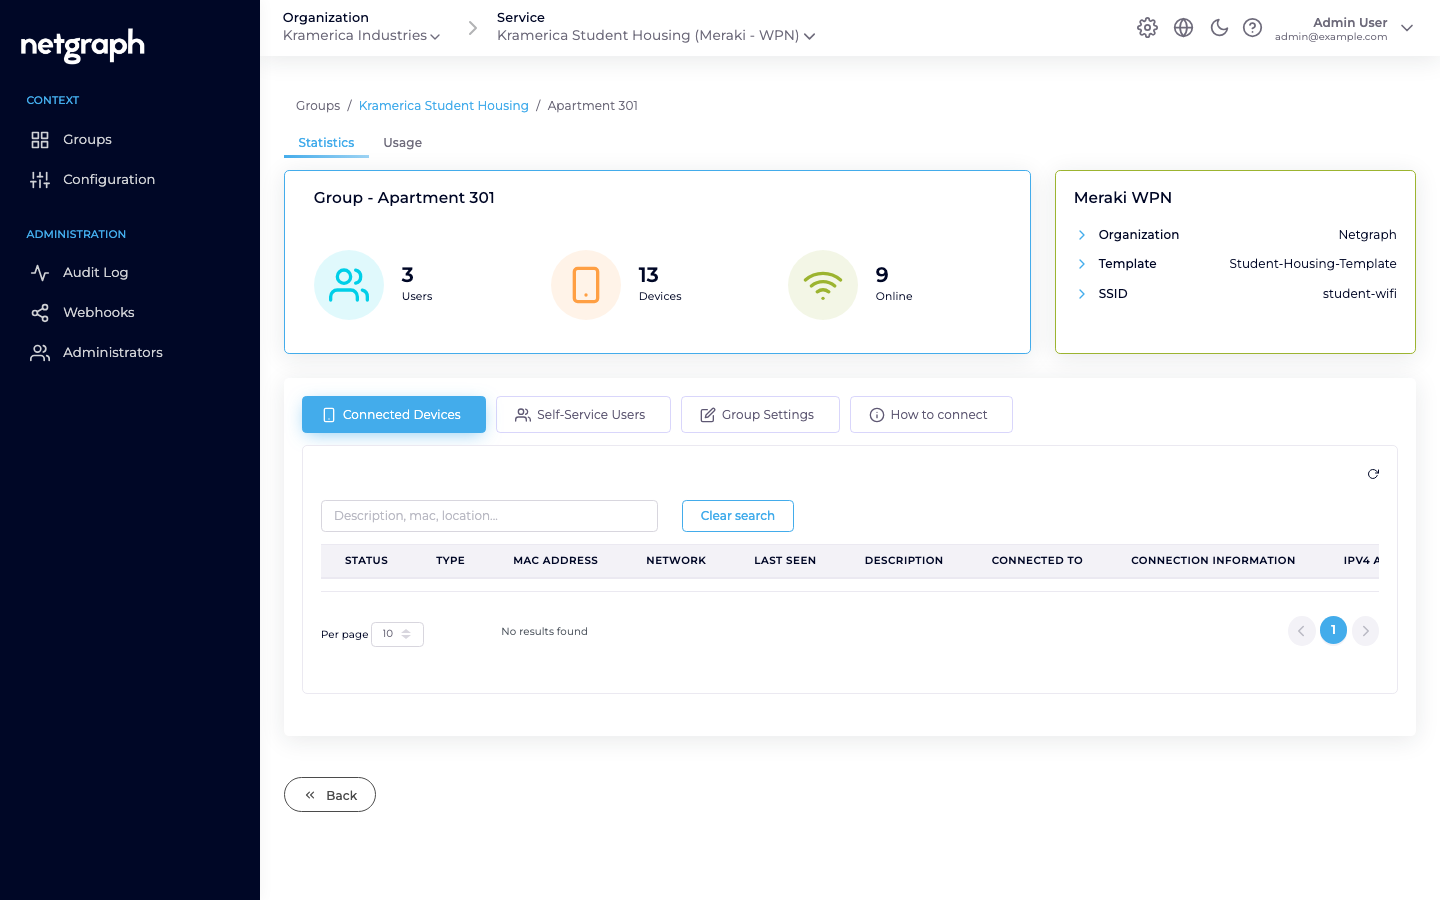
Six sections:
- Statistics (top) — Users, Devices, Online counts, plus the Meraki WPN summary (Organization, Template or Network, SSID).
- Usage (top) — time-series chart of Registered vs Online devices for this WPN specifically.
- Connected Devices tab — the clients currently joined to this WPN’s PSK, with columns for Status, Type, MAC, Network, Last seen, Description, Connected To, Connection info, IPv4, First seen.
- Self-Service Users tab — the residents (see Managing Self-Service Users).
- Group Settings tab — rename, rotate the PSK, remove.
- How to connect tab — the admin’s view of the connection details (SSID, masked PSK, QR code). Useful when you need to help a resident onboard before they sign into the portal.
Rotating the Pre-Shared Key
Section titled “Rotating the Pre-Shared Key”Rotate when a key leaks, when a roommate moves out and the unit doesn’t want them keeping access, or on a periodic schedule.
-
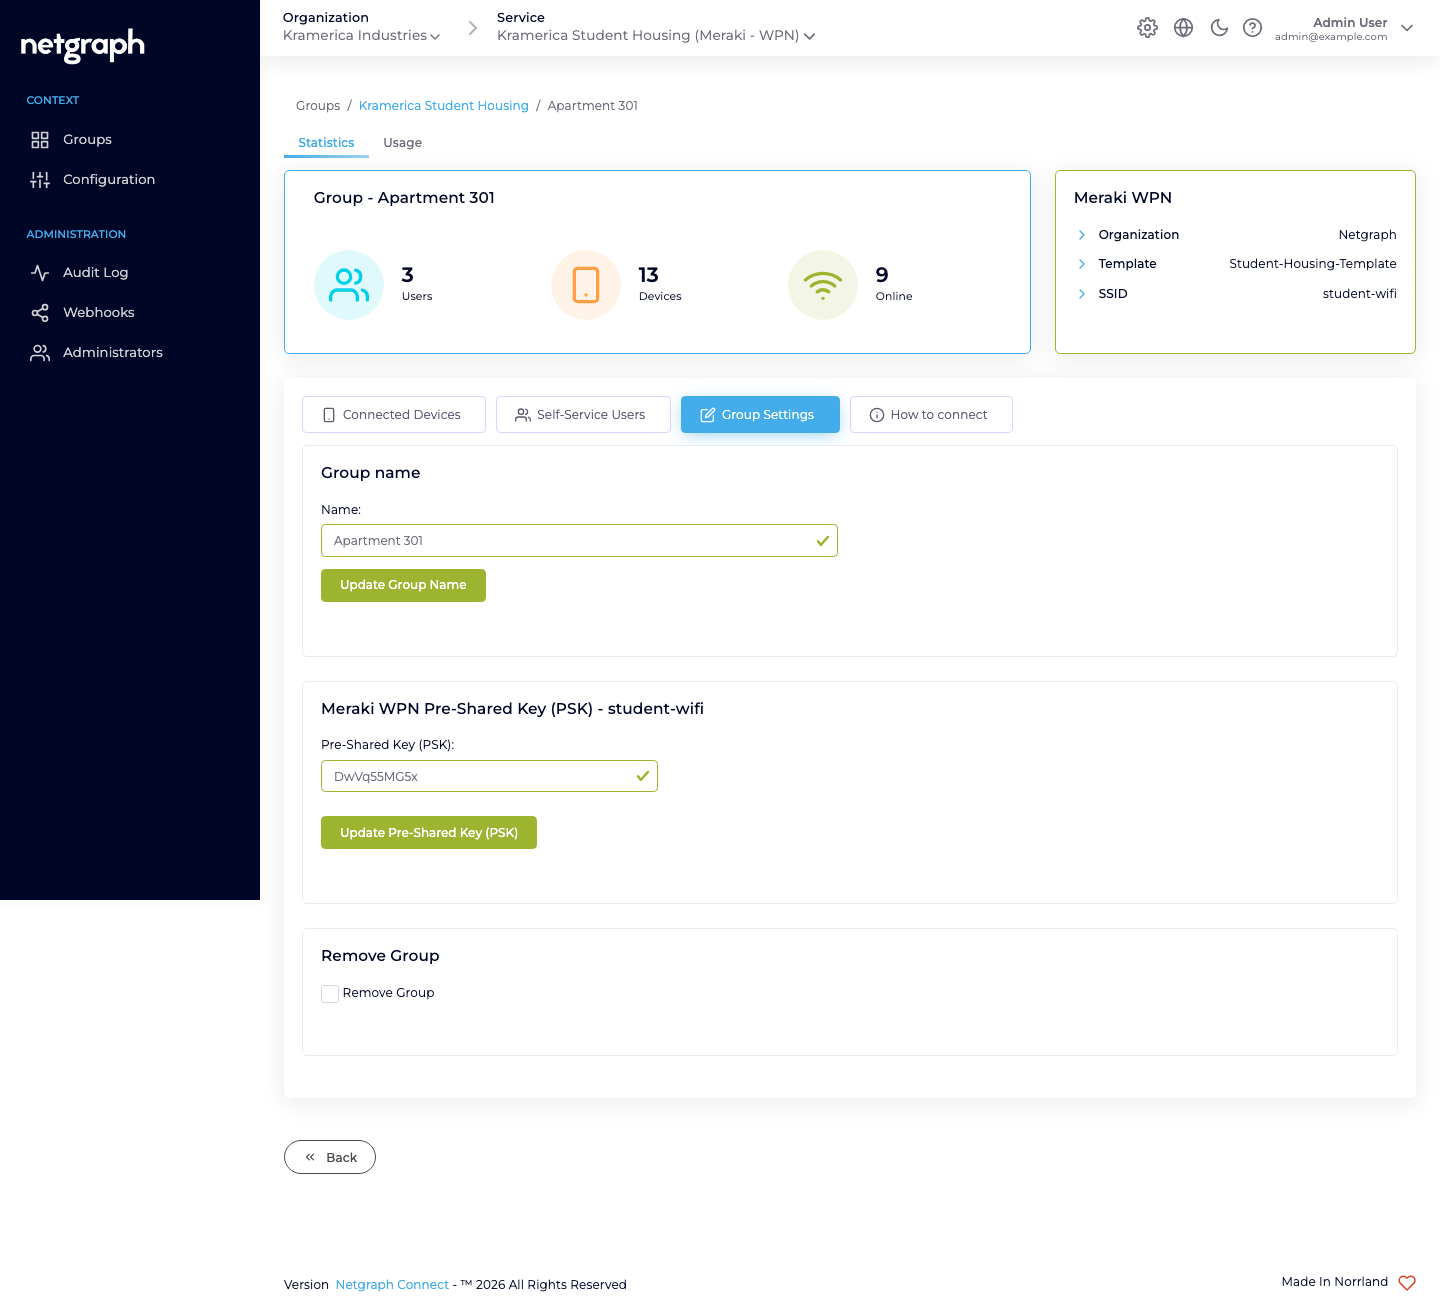
Open the WPN's Group Settings tab
Under the Pre-Shared Key section.
-
Enter or generate a new PSK
8–63 characters.
-
Click Update Pre-Shared Key (PSK)
The platform re-programs the Meraki Identity PSK on every associated Meraki network. Devices currently joined with the old key stay connected until they try to re-associate, at which point they prompt for the new key.
Tip
Residents with the Group Administrator permission can rotate the PSK themselves via the Self-Service portal. In most deployments that’s the right path — admins don’t need to be in the loop for every per-unit rotation.
Renaming a Wireless Personal Network
Section titled “Renaming a Wireless Personal Network”The Group name field on Group Settings. Rename as many times as you need. The displayed name updates in the Context overview, in every resident’s Self-Service portal, and in the Meraki dashboard’s Identity PSK name.
Seeing who’s connected (admin)
Section titled “Seeing who’s connected (admin)”The Connected Devices tab on any WPN. The same data is also aggregated at Context level under the Devices tab on the Context overview, with a Group column so you can tell which apartment each device belongs to.
Filter by description, MAC, or location (when a Meraki tag includes the Network / SSID location).
Removing a Wireless Personal Network
Section titled “Removing a Wireless Personal Network”When a unit is permanently retired — a resident has moved out and the lease is closed, or a room is being repurposed.
-
Open the WPN's Group Settings tab
Scroll to the Remove Group section.
-
Check the Remove Group box
A confirmation button appears.
-
Confirm
The platform deletes the Meraki Identity PSK, deletes the associated Meraki Network Access Policy (if the Context uses the One policy per group strategy), and removes all Self-Service Users scoped to this WPN. Connected devices are immediately kicked off the SSID.
Warning
Removal is not reversible. If you need to pause a unit without destroying it, rotate the PSK to something residents don’t know — devices will disconnect, the unit goes dark — and rotate again to a new key when it’s re-activated.