
EasyPSK via RADIUS overview
The RADIUS delivery of EasyPSK for Cisco Networks: the platform acts as the RADIUS server for your Cisco wireless, maps the key a device typed to the right group, and issues per-group or per-device keys with three security flavours.
EasyPSK via RADIUS is the primary delivery method under the EasyPSK for Cisco Networks umbrella, and it is created and managed as an EntryPoint Context: the wizard variant is EntryPoint 2.0 (EasyPSK). Instead of provisioning every key onto the wireless platform up front through the Cisco Meraki Dashboard API (the Meraki WPN way), the platform acts as your wireless network’s RADIUS server: when a device joins the SSID, Cisco exposes the key the user typed, and EasyPSK places the device in the matching group.
Your wireless network authenticates each connecting device against the platform over RADIUS. The key the user typed identifies the group; keys are resolved at connection time instead of being pre-provisioned on the wireless platform, so there is no provisioning cap on key count.
What you get
Section titled “What you get”- One key, the right group. Each group in the Context owns one Pre-Shared Key (or, with the Dedicated flavour, one key per device). The platform generates the keys; they are unique within the EntryPoint and regenerate-only.
- Three security flavours per group — Instant (frictionless, devices auto-register), Approved (devices must be pre-registered, with optional four-eyes device approval where a second administrator acknowledges each registration), and Dedicated (a unique key per device). See Groups and security flavours.
- Scale without provisioning. Keys are resolved over RADIUS at connect time: the service handles 100,000+ keys and scales horizontally, so the practical ceiling is far higher. Meraki WPN’s Dashboard-API provisioning, by contrast, is bounded at 5,000 keys per Meraki network.
- Group controls. A device cap, time-bound validity, a recurring schedule, and a device block list, all per group. See Group controls.
- Kiosk self-enrollment. A group can create itself at a resident’s or guest’s first Self-Service login, including from an on-site kiosk screen or an online kiosk. See the Self-Service portal.
- Works across Cisco wireless. Anything that can point an Identity-PSK SSID at an external RADIUS server: Cisco Meraki (Identity PSK with RADIUS) and Cisco Catalyst 9800.
- Self-Service. Group members can see their key and, if you allow it, rotate it themselves; Dedicated device keys are managed per device.
Setting it up
Section titled “Setting it up”-
Create the Context
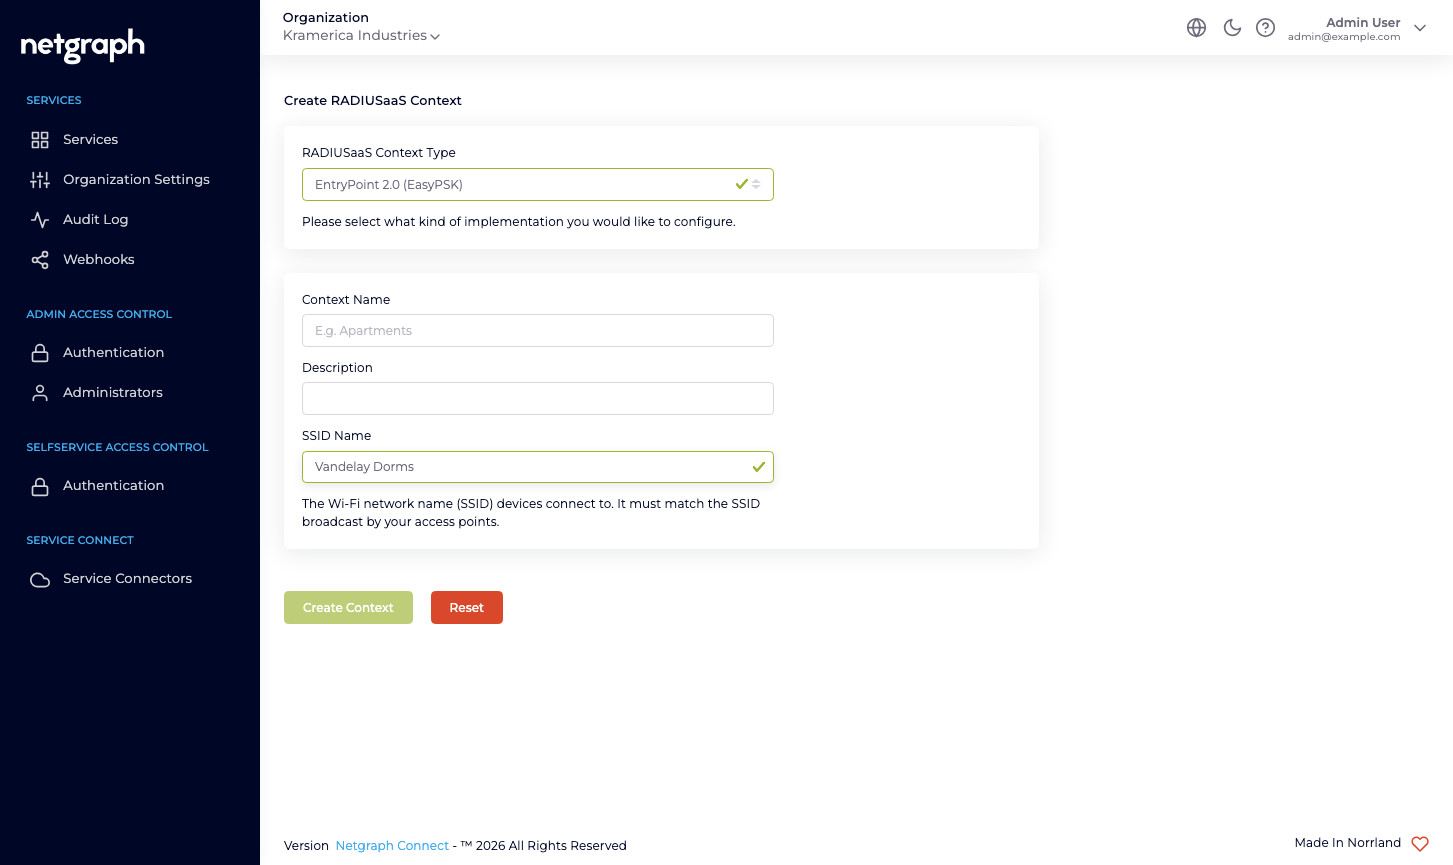
From the Organization’s Services overview, click Add Service Context and pick the EntryPoint - RADIUSaaS card. Choose EntryPoint 2.0 (EasyPSK) as the RADIUSaaS Context Type, name the Context, and enter the SSID Name — the Wi-Fi network name devices connect to. It must match the SSID broadcast by your access points.
-
Point your wireless at the Context
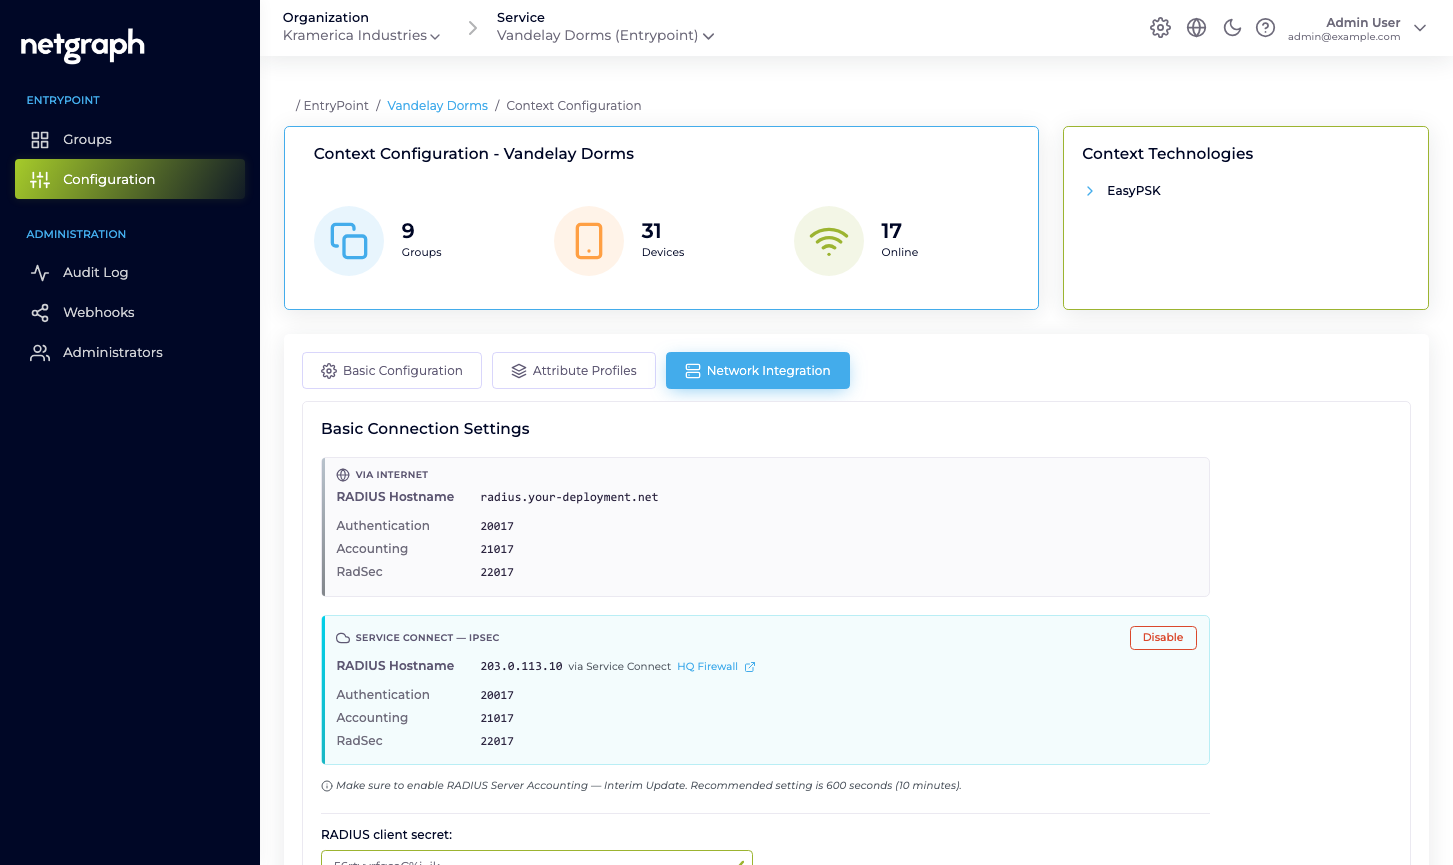
Open Configuration → Network Integration to find the Context’s RADIUS hostname and the authentication, accounting, and RadSec ports, and to set the RADIUS client secret your network equipment authenticates with. The same page holds the RadSec toggle, the server certificate, the RADIUS access allow-list (CIDR), and the optional Service Connector binding for a private IPsec path. Then configure the SSID on the wireless side: Cisco Meraki or Cisco Catalyst 9800.
-
Create the groups
One group per unit, team, or audience. Pick each group’s security flavour at creation; the platform generates the group’s key. See Groups and security flavours.
-
Distribute keys and invite members
Reveal a group’s key from Group Settings and share it with the unit, or invite members as Self-Service Users so they can see it (and rotate it, if you allow self-service regeneration) from the Self-Service portal.
Transport
Section titled “Transport”| Option | What it is |
|---|---|
| RADIUS / RadSec | The Context exposes per-Context authentication, accounting, and RadSec ports; enable RadSec for RADIUS over TLS |
| Service Connector | The RADIUS traffic runs through your Organization’s private IPsec tunnel instead of over the public internet |
Restrict who can reach the RADIUS service with the RADIUS access allow-list (CIDR ranges) on the Network Integration tab.