
Meraki WPN quickstart
From zero to one apartment connected to its own Wireless Personal Network, with its Group Administrator invited to the Self-Service portal — about 20 minutes.
This quickstart covers Meraki WPN, the Meraki Dashboard-API delivery of EasyPSK for Cisco Networks. It takes an Organization from no Context to one apartment with a Wireless Personal Network, a Group Administrator who can connect their phone, and two roommates they’ve invited. Expect about 20 minutes, most of it spent collecting the Meraki API key and verifying the SSID in the Meraki dashboard.
Note
Looking for the primary delivery method? EasyPSK via RADIUS serves both Cisco Meraki and Catalyst 9800 and scales past 100,000 keys: start at EasyPSK via RADIUS.
Warning
External DHCP required. EasyPSK doesn’t work with Meraki access-point-assigned DHCP (NAT mode). Confirm your Meraki network uses an external DHCP service before starting.
Before you begin
Section titled “Before you begin”You have administrator access to the Organization and the Admin Dashboard is open at the Services overview. You’ll also need:
- A Cisco Meraki dashboard with an MR-series wireless network.
- A Meraki Dashboard API key. Full organization access (Read/Write) is required for the Template based configuration type; a network-scoped key (Read/Write) is sufficient for the Networks based types.
- An SSID configured for Identity PSK without RADIUS in the Meraki dashboard.
- The email address of the first resident you’ll appoint as Group Administrator.
1. Add the Meraki WPN Context
Section titled “1. Add the Meraki WPN Context”-
Open the Add Service Context picker
From the Organization’s Services overview, click Add Service Context.
-
Pick Meraki - Wireless Private Network
Click the Meraki - Wireless Private Network card. You’ll land on the new Context’s landing page with Create Wireless Personal Network still disabled — the Meraki integration isn’t configured yet.
2. Connect to the Meraki dashboard
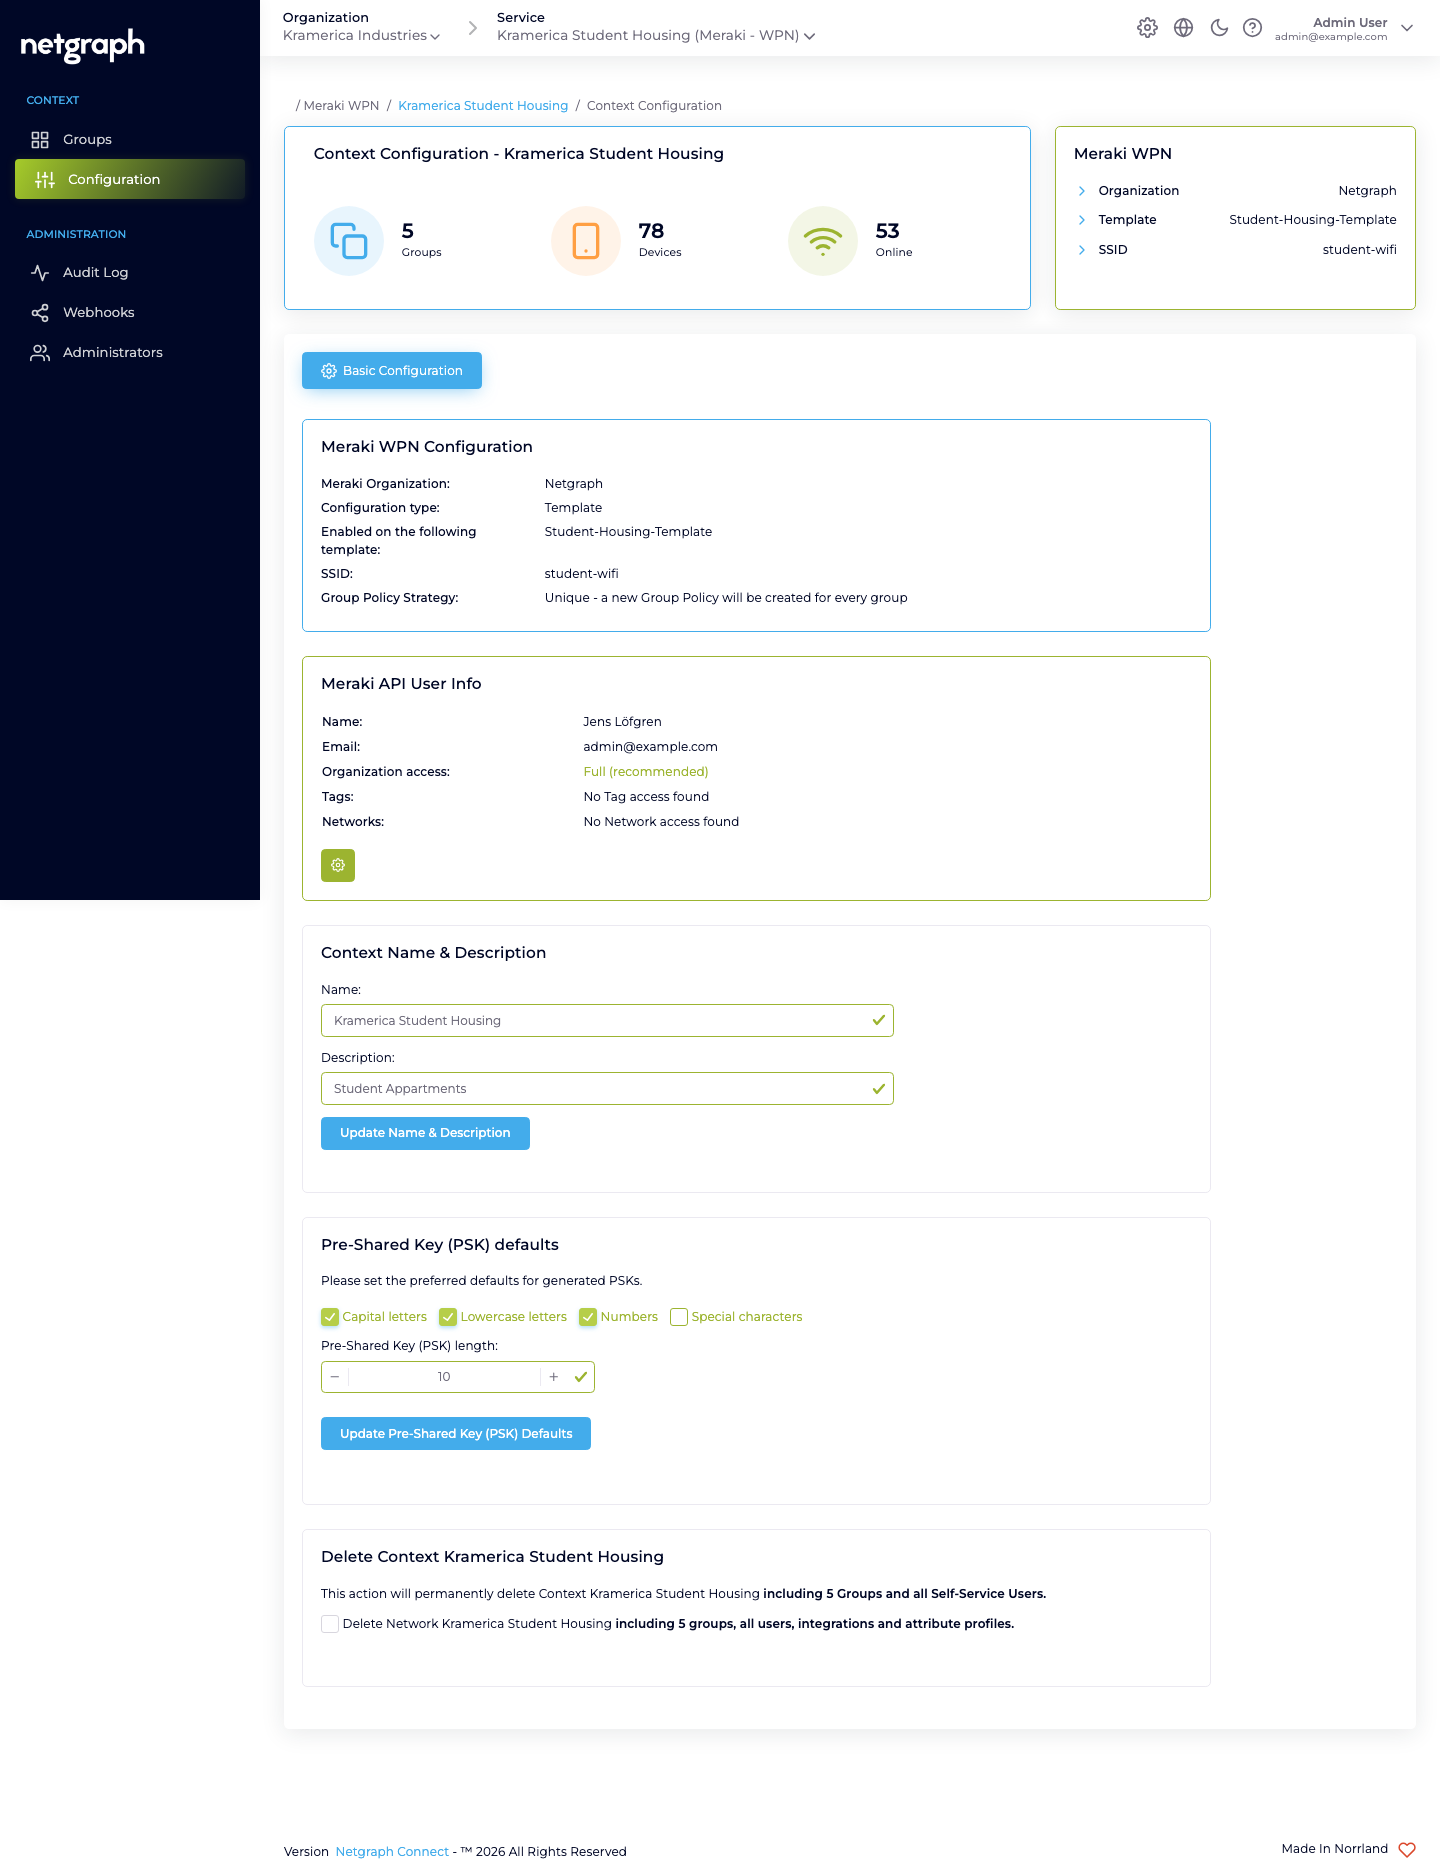
Section titled “2. Connect to the Meraki dashboard”Open Configuration → Basic Configuration and fill the Meraki WPN fields:
-
Paste the Meraki API Key
40 characters. The platform immediately queries the Meraki Dashboard for the organizations the key can reach.
-
Pick the Meraki Organization
Select the Meraki organization that owns your wireless network.
-
Choose a Configuration type
- Template based — the Meraki network inherits from a configuration template. Pick the template.
- Networks based (single network) — one specific Meraki network. Pick it.
- Networks based (multiple networks) — the same WPN SSID on several networks. Enter the SSID name, click Fetch matching networks, then check the networks to cover.
-
Pick the SSID
The dropdown shows SSIDs configured for Identity PSK without RADIUS on the selected network or template. One Context governs one SSID.
-
Choose a Meraki Group Policy Strategy
Shown for Template based and single-network setups; the multiple-networks setup always uses One policy per group.
- One policy per group — every Wireless Personal Network gets its own Meraki Group Policy. Fine-grained per-unit behaviour at the cost of more policies in the Meraki dashboard.
- Shared Policy — every Wireless Personal Network references the same pre-existing Meraki Group Policy. Fewer policies, uniform treatment.
See Meraki connection for the trade-off.
-
Set Pre-Shared Key defaults
Pick the character classes (capital / lowercase / numbers / special) and the default length (8–63). These apply to auto-generated PSKs going forward.
-
Save
The landing page’s Create Wireless Personal Network button now becomes active.
3. Onboard the first apartment
Section titled “3. Onboard the first apartment”-
Click Create Wireless Personal Network
On the Context landing page. The form shows two tabs: Create single and Create multiple.
-
Create single — for the first apartment
Enter the Name (for example, Apartment 301) and accept the auto-generated Pre-Shared Key (or paste your own, 8–63 characters). Click Create Wireless Personal Network. The platform writes a Meraki Identity PSK on each associated network and lands you on the new Wireless Personal Network’s detail page.
Tip
Onboarding an entire building? Switch to Create multiple — enter a Name prefix (e.g. Apartment ), a starting counter, and how many units. The platform creates the whole batch in one go.
4. Invite the Group Administrator
Section titled “4. Invite the Group Administrator”-
Open the Self-Service Users tab
In the Wireless Personal Network’s detail view.
-
Click Add Self-Service User
Enter the resident’s email. Check Group Administrator (the User (default) permission is always on). Leave Send email invite? checked and click Add Self-Service User.
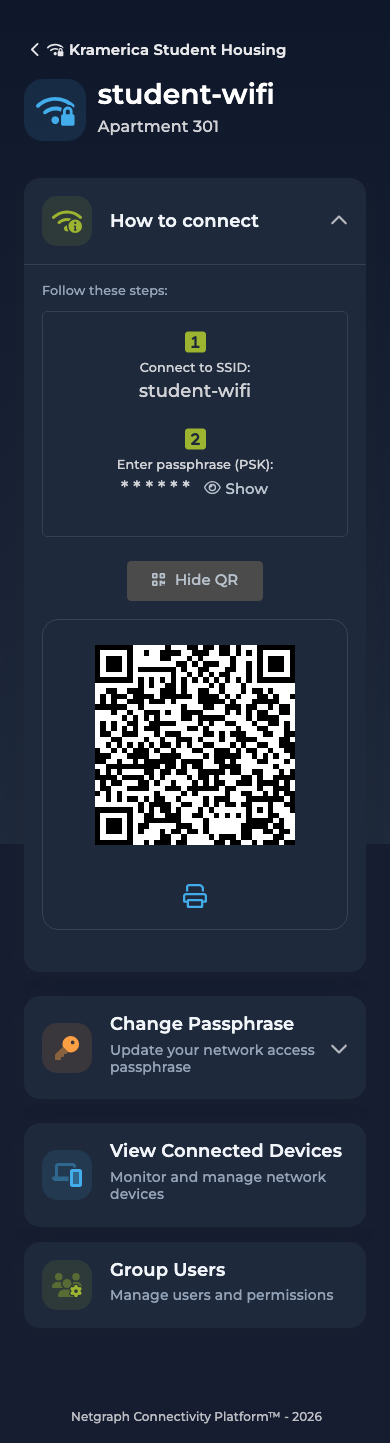
The resident receives a Self-Service portal login email. When they click the link they see their apartment’s How to connect card (SSID + PSK + QR code), a Change Passphrase card to rotate the key, View Connected Devices to see everything joined to their bubble, and Group Users to invite their roommates.
5. Connect a device
Section titled “5. Connect a device”The resident scans the QR code (or types the PSK manually) on their phone. The phone joins the shared SSID with the apartment’s private key. Back on the admin side, under the Wireless Personal Network’s Connected Devices tab, their phone shows up within minutes.