
Set up SCIM provisioning
Connect your identity provider (Okta, Microsoft Entra ID) to provision administrators and groups into your Organization automatically over SCIM 2.0. Users become administrators, groups become Teams.
SCIM provisioning lets your identity provider create, update, and deactivate administrators in your Organization automatically. When you add someone to the right group in Okta or Microsoft Entra ID, they appear as an administrator in Netgraph; the IdP group becomes a Team; and when they leave the group or are deactivated, their access is withdrawn. No invitations to send by hand.
It lives at Admin Access Control → Provisioning in the Organization left navigation.
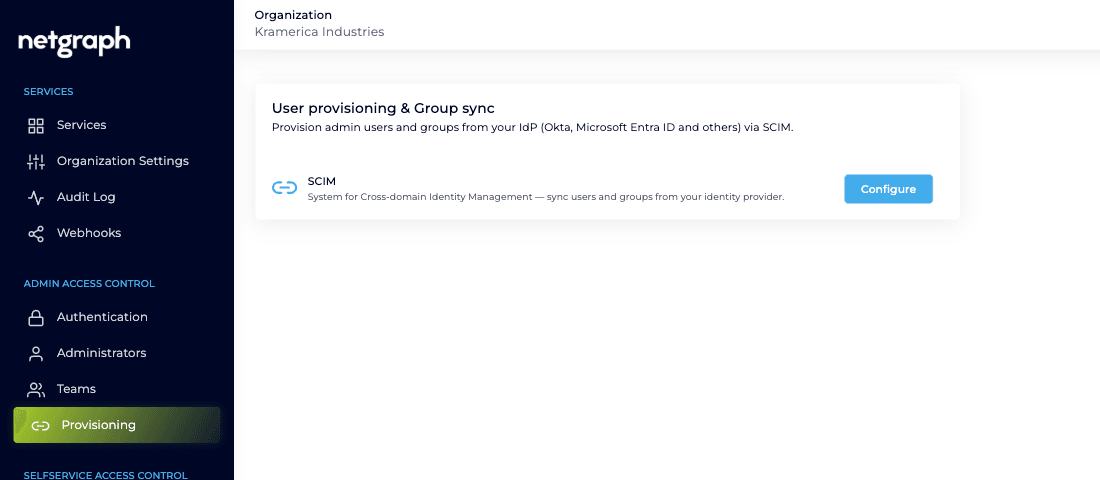
What SCIM syncs
Section titled “What SCIM syncs”- A user in your IdP becomes an administrator in your Organization, with the default role you choose.
- A group in your IdP becomes a Team (see Organizing administrators in Teams). The group’s membership becomes the Team’s membership.
SCIM keeps membership and names in step. It never assigns roles — you map each Team to roles yourself, and that stays under your control no matter what changes in the IdP.
Enable SAML single sign-on first
Provisioned administrators sign in with SAML, so configure [Admin Portal authentication](/wiki/organization/setup/admin-authentication/) before you connect SCIM. A provisioned user with no way to sign in can't do anything.Connect your identity provider
Section titled “Connect your identity provider”Open Provisioning → SCIM → Configure. The screen gives you the two values your IdP needs.
-
Copy the SCIM endpoint URL
Copy the SCIM endpoint URL shown on the page into your IdP’s SCIM (provisioning) configuration. This is the address your IdP pushes users and groups to.
-
Generate an API key
Click Generate API key. The key is shown once — copy it immediately and paste it into your IdP as the bearer token, then close the dialog.
-
Turn on provisioning in your IdP
In Okta, Microsoft Entra ID, or your other provider, enable SCIM provisioning for the application and assign the users and groups you want managed. They begin appearing in Netgraph as administrators and Teams.
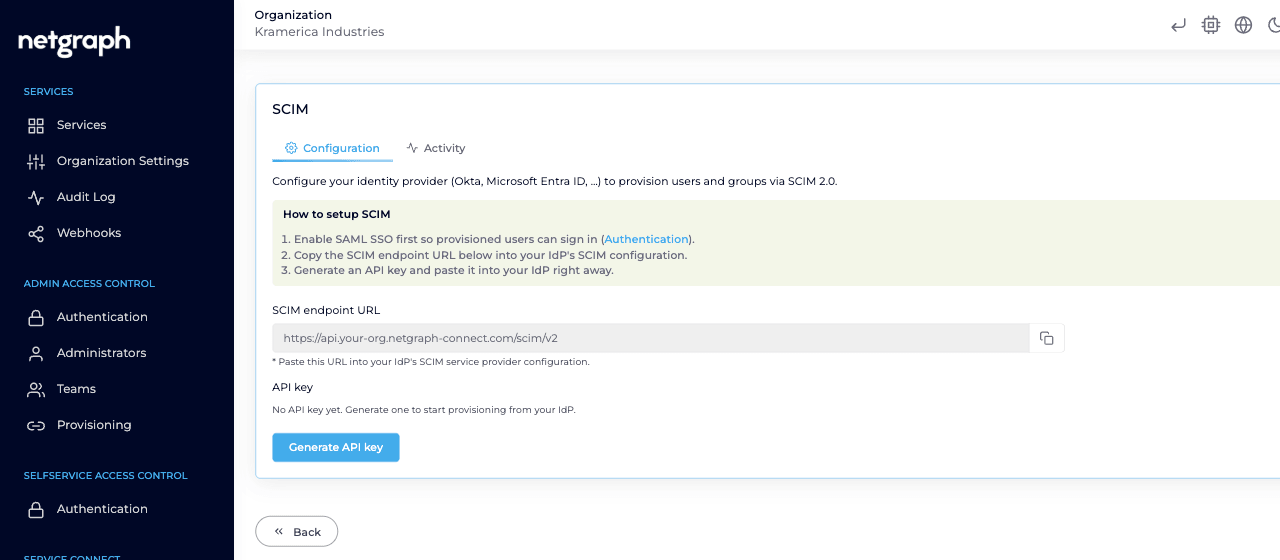
The API key is shown once
Netgraph keeps only a hash of the key and can't show it again. If you lose it, use **Regenerate API key** — the previous key stops working immediately, so update your IdP with the new one. **Remove configuration** revokes the key and stops provisioning entirely.Keeping access in step
Section titled “Keeping access in step”Provisioning runs continuously:
- Add a user to the IdP group, and they become an administrator.
- Remove or deactivate them, and their administrator access is withdrawn and they leave every Team in the Organization.
- Delete the IdP group, and the matching Team is removed.
Related pages
Section titled “Related pages”- Organizing administrators in Teams: what provisioned groups become.
- Managing Administrators: the manual side of the same table.
- Admin Portal authentication: the SAML sign-in provisioned users rely on.